


03 Aug How To Grow Indoor Plants
In the cooler months we are spending more time indoors and its always nice to bring the outdoors inside with indoor plants. Indoor gardening can be a little tricky but persistence is the key and well worth it in the end so you can have lovely greenery around you, in your home and in your office.
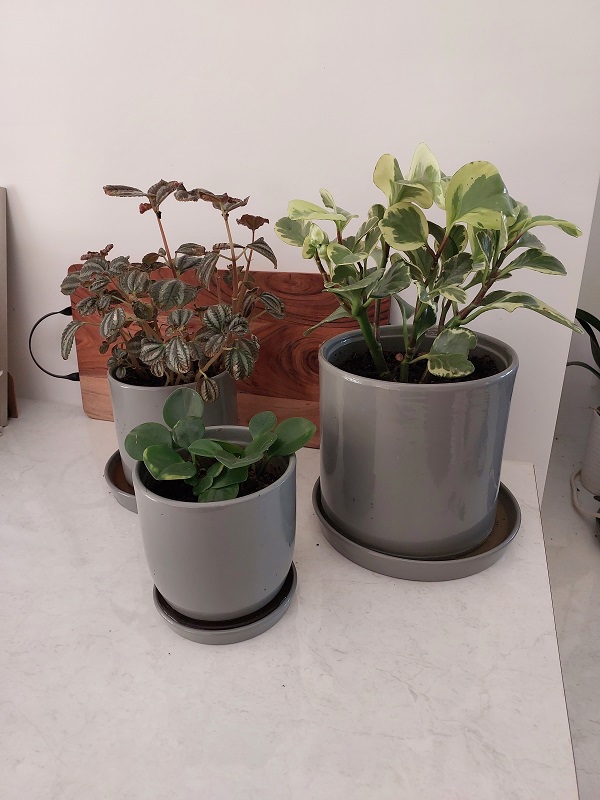
What makes an indoor plant?
The first thing to understand is that there is no such thing as an indoor plant! This is important to remember, all plants grow outside however the ones that work best outside are those that naturally grow in the under storey of rainforests, shady moist environments like the edges of caves or in the canopies of trees. Many indoor plants are actually epiphytes – those plants which don’t need deep soil or light and they take nutrients in from the air like orchids.
Then you also have some plants which nursery growers over the years have decided to try growing in hot houses or shade houses and they have cultivated these plants over time as species that are marketed as indoor e.g palms and figs.
Plant selection indoors
You need to select the right plant for the location where it will be placed indoors. Just as you do when you select a plant for your garden outside. I think this can be the biggest down fall of indoor gardening as you do tend to lean more towards the looks of the plant, its leaf colour, leaf shape and how it will work with your décor rather than checking about the conditions that plants require for it to grow, survive and thrive. Before you go to the garden centre really take note of the conditions indoors.
Indoor conditions to consider
- Light Level – Does the location inside get direct sunlight or indirect light or is there no direct light – is it a dark room.
- Heating/Cooling – Most indoor plants are not going to enjoy having hot or cold air blown across their foliage from air conditioning or heating vents.
- Temperature of the room – Does the temperature change during certain season and or times of day. Most plants sold for indoor use will prefer warmer conditions but most importantly they will like to have a constant temperature rather than extremes throughout the day.
- Also consider how are you going to water your indoor plants? Can you lift the plant to a sink or do you need to carry a jug of water to it?

How do you water indoor plants
*Watering – How are you going to get water to the plants easily and without making a mess, spilling water everywhere. I think the easiest way of watering indoor plants is by sitting them in the sink or the shower or the bath or even a plastic bucket. Put the plug in the sink, fill the water up and then place the plant in the water. This way the plant will take up the water via capillary action. Leave the plant sitting in the sink for a few hours Whilst it is in the sink I normally allow the water from the tap to gently wash over the foliage or you can wipe over the foliage with a clean wet cloth. I also water the top of the soil lightly. If you have a shower spray head or a watering can with a rose nozzle this could be used to wash the foliage down whilst it is sitting in the sink. You will then need to take the plant out of the sink to drain for a few hours. If you have the plant sitting within a ceramic pot that has no drainage hole then you will need to go back and check it a few hours after you return it to ensure the plant is not sitting in a pool of water. If you have a ceramic pot with a drainage hole then double check the water has all drained out or sit the pot in a matching saucer to ensure you don’t have any spillage. You can also use plastic saucers inside your vessels to catch the water. If it is a larger plant that is too hard to carry to the sink every week then having it sit in a saucer internally within the pot is a good way to water. You do need to check at what rate it is drinking the water. This is to prevent the plant from being over watered. I would recommend that once a fortnight you lift the larger plant out of the saucer and then tip out the water, to prevent the water from becoming stagnant.
Knowing when to water can be tricky as it is all dependent on plant species, how much light the plant gets and what the temperature in the room is. I would normally tell clients to do the “Finger Test”. This is checking the soil of their plants once a week by sticking their fingers into the soil about two – three cms deep. If the soil feels moist and sticks to your finger then the plant is okay. If the soil either doesn’t stick to your finger or falls off very easily then it is most likely dry. If the soil sticks to your finger and feels muddy then it is overwatered. In general, depending on the plant species, I would say water once a week during the warmer months and once every ten days or so in the cooler months. During the cooler months if you have a fire place or heating on it will dry out the soil quicker so you will need to monitor this.
Another way of identifying if your plants need water is their foliage. Their foliage will hang limply or be sagging on the stems. The leaves might also feel thinner or more papery. Over time you will begin to recognise these signs of dryness. Watering indoor plants is an art but by getting to know your plants well, you will be able to care for them accordingly.
Trouble Shooting
In my experience the biggest issue people have with indoor plants is watering – it may be under watering or they kill them with kindness and give them too much water.
*Under watering causing the soil to become water repellent
The soil of indoor plants can become water repellent as the plant owner will just tip a little bit of water on the plant at a time. The soil starts to dry out. Once the soil starts to dry out you can continue to tip a few cups of water on it every day but it won’t actually re -wet the soil completely. You will be watering the plant but notice the water either runs through very quickly or it sits pooling on the top of the soil and then you will notice bubbles start appearing on the surface. This is because it is dry and air pockets have developed in the soil. The only way of fixing this is by taking the plant to the sink or put it in a bucket and then flood the soil – water it to the top of the pot let it drain away and then do that again continuously until you do not see any air bubbles on the surface. You could even submerge the plant totally in the water. When the bubbles stop it will mean that you have rewet the soil and the soil will then be able to hold water for the plant’s roots to take up. This is why I recommend watering indoor plants in a sink or bucket where they can be watered properly.
*Over watering
Watering your indoor plants too much or leaving them standing constantly in a saucer of water can cause the soil to become muddy, anaerobic and smelly. This can lead to fungal growth in the soil and then damage to the roots. Ensuring your plants have just enough water is always the best. Many growers will say indoor plants actually thrive on more neglect than too much water.
*Wash Down the Foliage
Indoors, the plants will get dust building up on the foliage. This will need to be removed regularly. If dust is left on the foliage it will prevent the leaves from photosynthesizing and can attract disease. I highly recommend washing the plants down in the sink or shower when you are watering them. Alternatively you can use a water spray bottle and a cloth to wash down and wipe the leaves. If the plants are able to be moved, when it is raining you can carry them outside to give them a natural wash down. Always remember if you do this you need to be around to bring them in before the sun comes out again otherwise they will burn or if you leave them outside in winter the cooler temperatures may kill them.
*Fertilising
Indoor plants will require fertilising just as you would outdoor plants however you will want to try and avoid the fertilisers with a strong odour for inside. A soluble fertiliser used in the water when you water your plants is an easy way of feeding indoor plants. I would do this once a month from Spring through to the end of Autumn. A slow release fertiliser such as Osmocote is also good to release nutrients over a certain amount of time. You would use the slow release fertiliser as per package directions. Normally this can be applied in Spring and Autumn.
If you do have a shady warm area outside that is protected from frost you could take your plants outside to give them a fertilise. With the fertiliser that has a strong odour such as a seaweed emulsion or an organic liquid fertiliser. This may mean you need to leave the plants out overnight to drain and to allow the smell to dissipate so ensure you have a protected spot to do this. Ideally do not do this in Winter in cooler areas.
Stay tuned for next month’s newsletter when I will focus on what indoor plants I recommend to grow.